Replacing an NetApp NVRAM IV battery

Earlier I posted about how to stop your NetApp Filer from shutting itself down every 24 hours if it had a bad battery. Clearly this isn’t the best solution, it would probably be better to replace the battery completely. Then you get the benefit of battery backed cache if you have the bad luck to lose power.

So to try to fix this situation, I had a really good hunt on the internet for sites selling a battery specific to this model. The best I could find was a company that would sell me a whole new NVRAM IV card for $2500 USD! At least it had a refurbished battery, but it was a little more than I wanted to spend.

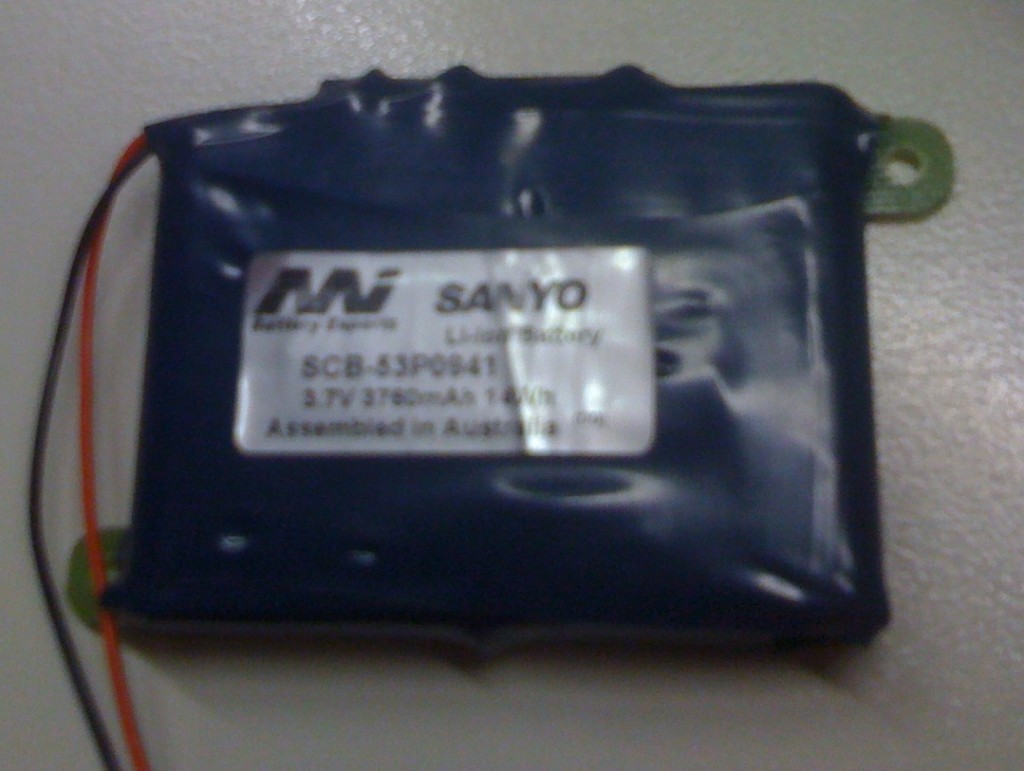
I ended up taking the battery to a auto battery shop on a lark and the guy there reckoned he could sort me out. I left the original one with him for around two weeks. He ended up selling me a Sanyo SCB-53P0941 . It cost about $80 bucks. It was a little bit bigger than the original one and wouldn’t fit on the NVRAM IV housing, so I lashed it in place with a cable tie.

As you can see from this horrible photo, I have an old iPhone.

As you can see from this horrible photo, I have an old iPhone.

It took about a day to charge up but now it looks like things are good, as you can see by the log below:


netapp*> environment status chassis NVRAM4-battery-7
NVRAM4-battery-7 ok.
netapp*>

The original battery looked like it had a chip in it, so I thought it might need to grafted on to the new battery, but it’s pretty stock. Now you can sleep at night, knowing that you won’t lose any data. Obviously, this is very dodgy and you shouldn’t connect some battery that a random dude in an auto parts store sent you. Our NetApp Filer (FAS960C) is so old that it is out of support, so I had nothing to lose, and the information for a blog post to gain.

Posted in tip | Tagged , , , | Leave a comment

How to get rid of SECJ0055E error message in WebSphere Portal

On a Portal 6.0 server I’m working on, I kept seeing the following error message in my SystemOut.log . It came up every half hour.


[10/11/10 12:17:41:439 EST] 0000005b MethodDelegat A SECJ0055E: Authentication failed for wasadmin. The user id or password may have been entered incorrectly or misspelled. The user id may not exist, the account could have expired or disabled. The password may have expired.

But my Was Password was correct. I had set it myself and just used it to log into the admin console.

The key is the “MethodDelegat” part of the log message. This column is the source of the log message. “Delegate method” made me think of bundled applications that use the RunAsRole . The pznscheduler application runs on a schedule, and sure enough also has a RunAsRole associated with it.

So what has happened, is that the WAS password has changed but the password is also saved with the pznscheduler application, and that saved password hasn’t been changed. Quite simply, there is a mismatch. This can happen on 6.1 and 7.0, and may also be related to the Portal Admin Password – it just depends which user is mapped as the RunAsRole . There are more applications that use the RunAsRole for Portal 6.0 .

For 6.0 here are the default out of the box applications you need to worry about when changing the password. LWP_TAI, pznscheduler, LWP_CAI, LWP_Security_Ext.

Of course, you may have other custom applications you need to worry about. The LWP apps use the Portal Admin user by default, so that’s why I didn’t have to change them.

For 6.1 you should check pznscheduler and CatalogHandler and for 7.0 the pznscheduler application is the only one you need to worry about.

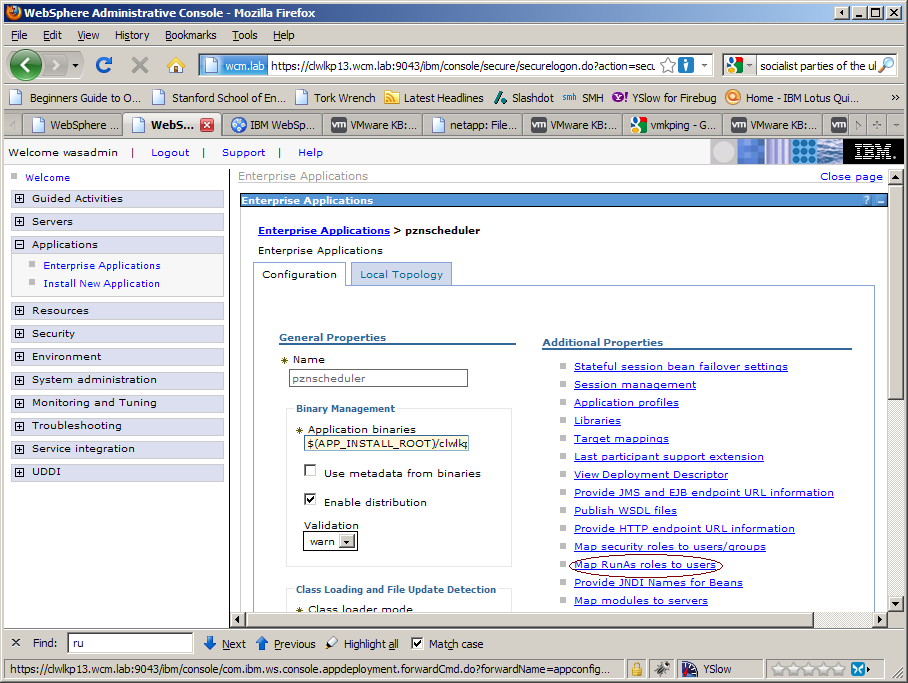
So to fix it up, if you log into the WAS Admin Console and look for the pznscheduler app in the list of Enterprise Applications, you will see the “Map RunAs roles to users” link like in the picture below.

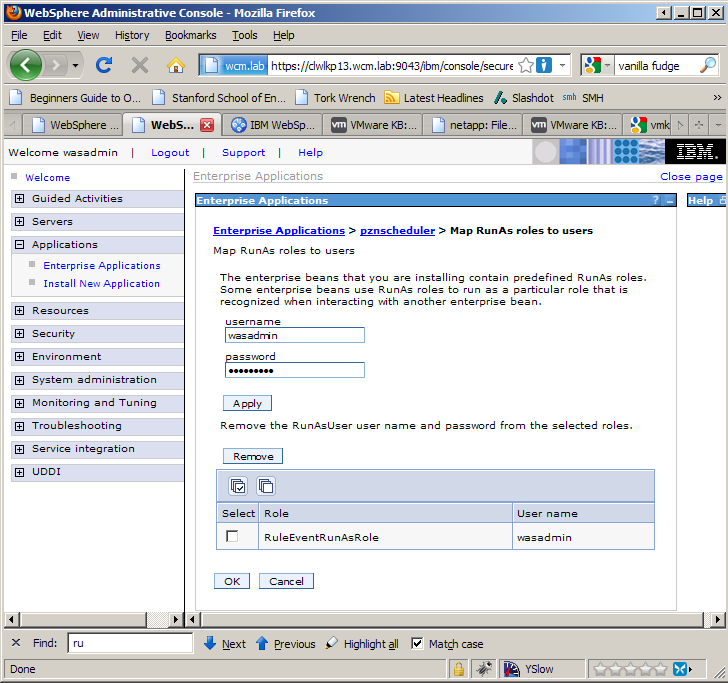
Then in the next dialog, reenter the new password.

This dialog can be a bit funny so you may have to play around with it a bit. Restart Portal and the error should be gone!

Posted in howto, tip | Tagged , , , , | 2 Comments

How to add additional packages to a CentOS repo

About 6 months ago, I posted instructions about how to add rpm packages to your local Fedora repository. The recommendations I made there don’t apply to CentOS in specific circumstances.

So I wanted to add an rpm for the Rational Build Forge agent to my CentOS install tree. The machine that hosts my RHEL/CentOS/Fedora repositories is an old Fedora 10 machine. One of the reasons why I blog about this stuff is to keep notes, so when I forget how to do something, it is easy to go back and copy and paste the esoteric command I am looking for. So I looked up the old post on how to add packages to a repo and after copying in the Build Forge rpm, I ran the following command:

createrepo --update -g repodata/comps.xml .

Then I edited my kickstart file to include the new package and tried to run the install. Immediately I got the following error:

"Unable to read package metadata. This may be due to a missing repodata directory. Please ensure that your install tree has been correctly generated. failure: repodata/primary/xml.gz from anaconda-base-200901061732.x86_64: [Errno 256] No more mirrors to try."

The command createrepo looks over your rpms and creates a bunch of metadata for them that yum reads when deciding to do updates. This metadata is saved in a folder called repodata, and I thought that the resulting folder might’ve been at the wrong tree. So I kept rerunning the install with the repodata folder in different places, all the while watching the apache logs to make sure the installer was hitting the right places and not getting too many 404 errors. This didn’t seem to be going anywhere until eventually I found an interesting bug report here.

Apparently the createrepo command has changed at 0.9.7. The default checksum routine that it now uses is sha256, where before it just used sha. You will recall that the server I am using as a repository is a Fedora 10 machine. The CentOS/RHEL version of the installation engine (named anaconda) doesn’t understand sha256, only the older sha checksum routine. So when the CentOS version of anaconda hits a repodata folder generated by createrepo running on Fedora 10, it just sees it as garbage.

The workaround is to force createrepo to use the sha algorithm, like so:

createrepo -s sha -o . -g repodata/comps.xml .

If you had a CentOS/RHEL only environment, this obviously wouldn’t happen, so this problem is quite localized. And will almost definitely go away with RHEL6, because that version of anaconda will be able to understand sha256.

Posted in random, tip | Tagged | 3 Comments

How to override a NetApp Filer missing battery shutdown

Our team recently became the proud owners of a dirty massive NetApp disk array. It was ex lease, so we got it for almost nothing. It’s circa 2004, so it old and dusty and a some of the hardware doesn’t work, but with a little TLC we’ve got it up and humming away. It was good fun getting it to work. I’m not entirely sure what to do with it, probably just dump more VMs on it!

One of the problems we had getting it to work was the NVRAM IV card . Being such an old machine, the battery backed cache on there was getting on a bit. Messages like this would come up in the console when booting:

[nvram.bat.error:CRITICAL]: The NVRAM battery in the chassis is *degraded*
[nvram.bat.error:CRITICAL]: The NVRAM battery in the chassis is *partially discharged*
[monitor.nvramLowBattery:CRITICAL]: NVRAM battery is dangerously low.
[nvram.bat.error:CRITICAL]: replayed event: The NVRAM battery in the chassis is *not safe to boot. Delay for charging canceled by user. Charger is ON *

In this situation, the machine sits in suspended animation for up to 10 hours until the battery charges to a certain level. It’s like being stuck in the bios. My battery is so old that it won’t hold enough charge, so I’m SOL.

You can override this charging phase by pressing ctrl-c when the filer is booting, however it will turn itself off after 24 hours, lest you should get complacent and think that your data is safe in the event of a power outage. NetApp as a company seem to be really serious about preventing data outage (mad respect yo)!

I think it would be cool to replace the battery in there, but I haven’t been able to find anywhere that will send me one for a reasonable price. Reading through the lines of the NetApp support site seams to suggest that the battery is only bundled with a NVRAM card, and that you can’t get them separately. I’ve cracked open the plastic seal on the battery and it looks like it is just a few camera batteries wired together and attached to a random circuit board. Haven’t been able to find any suitable parts yet to build my own, but if I do, you dear reader will be the first to know.

Until then I will disable the automatic shutdown, which seems to be undocumented, for obvious reasons. At the NetApp console, go :

options raid.timeout 0

It’ll periodically spit out little passive aggressive missives like this:

nvram.bat.missing.error:CRITICAL]: The NVRAM battery in the chassis is *missing or dead*. . Ensure battery is present and connected to the NVRAM card.
[no.halt.nvramLowBattery:warning]: NVRAM battery is dangerously low. Automatic system shutdown is disabled. Replace the battery immediately!

But just ignore them – it should keep on trucking!

Posted in howto | Tagged , , | 6 Comments

Workaround for Solaris 10 slow boot on VMware ESX 4.0

When building a Solaris x64 guest on VMware , the boot sequence when booting from the Solaris DVD seems to take forever. About 5 minutes in fact. Which is really annoying if you are trying to automate installing Solaris and you need to restart 50 times a day. The part I am talking about is after you select to boot Solaris from the grub menu – there is a sequence of dots that comes up until the next Solaris kernel seems to load. Incidentally the guest’s CPU goes to 100% during this sequence, which could be an issue if you are running on a loaded system.

Luckily there is a workaround. Go into the ‘edit settings’ screen for the Solaris guest and click the options tab. Change the Guest Operating System Version to Solaris 10 32 Bit, instead of 64 bit. Then the boot goes more like this:

[flashvideo file=http://www.torkwrench.com/wp-content/uploads/2010/07/solaris-10-boot-good.flv /]

I made a screen cast of the slow boot as well, but it literally is the same thing as above, except it just goes on for 5 minutes. It could be the most boring video on the internet. The fast boot video above is probably the second most boring video on the internet! It’s just a hard problem to explain in words.

This setting doesn’t mean that you’ll be running a 32 bit OS or anything either – as far as I can tell it doesn’t do anything besides fix the slow boot problem!

Posted in random, tip | Tagged , , , | Leave a comment

Why doesn’t the WCM authoring portlet come up after installing Portal?

Hey a Q and A post! Let’s hope the Q gets ‘A-ed’.

Peter commented on my post about installing Portal on Ubuntu, and my response got a bit long, so I thought it might might a good post by itself.

Peter writes:

got thru the install but WCM doesnt appear in the admin (for libraries) or UI. can you confirm you can see the WCM stuff in yr portal? and maybe share wpinstalllog.txt with me?

Hey Peter,

When WCM doesn’t come up, it could be a couple of things :

The simplest explanation is that you’ve selected the ‘admin’ install in the setup wizard, so you get a blank Portal out of the box. You can validate this in the PortalServer/wps.properties file, the property WPInstallType will tell you what sort of install you have done. To add WCM to an admin install, run the task:

wp_profile/ConfigEngine/ConfigEngine.sh configure-wcm-authoring -DPortalAdminPwd= -DWasPassword= .

Log into Portal and you should see the WCM stuff under the content tab.

It could also be that you have installed the server version of Portal. Check the file PortalServer/wps.properties and check the value of WPFamilyName . It should read WPFamilyName=content. If it says something else you’ve installed the ‘server’ version of the software – which doesn’t include WCM. This is the worst problem because you basically have to reinstall again – there’s no way to add WCM to a server version. You can see which downloaded files make up each version of Portal in the download documents for each release. The download document for the server version is here, and the content version is here. I hope this isn’t your problem 🙂

With 6.0 (not valid for 6.1, but I’ll include it anyway), on Linux you can get a problem where the WCM authoring page and portlet are there, but don’t render properly – the inside of the portlet is just blank. I’ve covered this before in this post.

Let us know how you go Peter!

Posted in tip | 8 Comments

DB2 9.5 install hangs on Linux during db2icrt

Yesterday I spent a bunch of time cleaning up our collection of kickstart files. It’s a grind, I must’ve rerun the Redhat installer 40 times in the last 24 hours. The nice thing is that we now have the same base linux install for all the different versions of Redhat and Fedora that we are using.

All this change has thrown up some new problems however. For each of the installs I was doing, the system would hang when trying to install DB2.

When there is a problem with the db2 install, the first place to go is the /tmp/db2setup.log. Inside that it seemed to be hanging on the instance creation step.

Command to be run: "cd /opt/ibm/db2/V9.5/;/opt/ibm/db2/V9.5/instance/db2icrt -a server -s wse -u db2fenc1 -p db2c_db2inst1 db2inst1".

Looking through the output of ps -ef | grep db2, I saw a suspicious process called UpdateAutoRun.sh.

I couldn’t find a DB2 specific technote for this error, but a bit of searching brought up this one from Tivoli Monitoring (ITM). Apparently DB2 installs an instance of ITM along with DB2 – I’m not sure what it is for. Anyway, there seems to be a dodgy script inside the ITM that relies on the venerable text editor ‘ed’. Without ed installed the log file /itma/logs/UpdateAutoRun.log keeps filling up with the line:

UpdateAutoRun.sh info: Delete of agent start all record successful.

Installing ed in (even while db2setup is running!) allows this script to finish and the rest of the install to complete successfully.

Posted in random | Tagged , , , | 3 Comments

mod_was_ap22_http.so wrong ELF class: ELFCLASS32

I’m experimenting with running Apache on our servers instead of IBM HTTP Server. This could be an advantage in terms of security updates – if a particular security vulnerability is fixed in Apache, it is going to be much easier to apply it by typing yum update than going to the IBM site and downloading the latest update and then struggling through the WAS Update Installer.

Anyway, when trying this out, I got this error when starting Apache. This error is pretty straightforward :


Starting httpd: httpd: Syntax error on line 993 of /etc/httpd/conf/httpd.conf: Cannot load /opt/WebSphere70/Plugin/bin/mod_was_ap22_http.so into server: /opt/WebSphere70/Plugin/bin/mod_was_ap22_http.so: wrong ELF class: ELFCLASS32

This simply means that the wrong version of the plugin is installed. I’m using 64 bit linux and 64 bit Apache, but the 32 bit version of the WAS Plugin. Reinstalling the 64 bit version made it work fine.

Posted in tip | Tagged , , | 2 Comments

CWUPI0033E on Solaris 10 when installing WAS

Here’s a weird one for you. We were trying to install 6.1.0.3 on a Solaris 10 system to do some tests. The Portal install would fail after about 10 minutes. In the /tmp/wpinstalllog.txt file, it was clear that the problem was due to a failure in the internal WebSphere Application Server install. (When you install Portal, the Portal installer will kick off it’s own silent install of WAS).

The first thing to do when debugging a WAS install problem is to look at the logs in ~/waslogs . These indicated the following problem:

CWUPI0033E:
There is insufficient free disk space on the system:

/opt/WebSphere/AppServer:
Required: 1403 MB
Available: 0 MB

/var/tmp/:
Required: 1403 MB
Available: 0 MB

/opt/.ibm/.nif:
Required: 2 MB
Available: 0 MB

Please ensure that there is enough free disk space
on all required filesystems and restart the installation.

If /var/tmp/ , /opt/WebSphere/AppServer
and /opt/.ibm/.nif are on the same partition,
then the amount of space required is the sum of the space
required on /var/tmp/ , /opt/WebSphere/AppServer and
/opt/.ibm/.nif.

My system had heaps of space on it! Surely the installer wouldn’t even run if there was 0 MB free! The method that the installer used to determine how much disk space was free was failing. But how does the installer figure out how much disk space is free? After lots of poking and prodding around I stumbled on dtrace. I had heard of it before, but never had the opportunity to use it. Dtrace is a mechanism to instrument and probe the tiniest little interactions on a Solaris/BSD/OSX machine. Being so powerful, it has a steep learning curve. This collection of handy dtrace oneliners was really helpful.

I kicked off the WAS install portion of the Portal install and ran this dtrace command in another window.

dtrace -n 'syscall::open*:entry { printf("%s %s",execname,copyinstr(arg0)); }' -o trace.log

It captured each file interaction that occurred when running the install. Luckily the WAS install failed after about 30 seconds, so there wasn’t too much data to wade through.

Here is the dtrace log (trace.log from the command above). Something called gushellsupport.sh is calling df (standard unix disk free command). This must be how the installer determines how much disk space is free. The column on the left is the pid of the install process (which is java) . The library files on the far right are what is being called by each executable; the next column over to the left.


0 44056 open64:entry gushellsupport.s /var/tmp/ismp003/gushellsupport.sh
0 43668 open:entry df /var/ld/ld.config
0 43668 open:entry df /lib/libcmd.so.1
0 43668 open:entry df /lib/libc.so.1
0 43668 open:entry df /usr/dt/lib/nls/msg/C/SUNW_OST_OSCMD.cat
0 43668 open:entry df /usr/lib/locale/C/LC_MESSAGES/SUNW_OST_OSCMD.mo
0 43668 open:entry df /var/ld/ld.config
0 43668 open:entry df /lib/libcmd.so.1
0 43668 open:entry df /lib/libc.so.1
0 43668 open:entry df /etc/mnttab
0 43668 open:entry df /usr/dt/lib/nls/msg/C/SUNW_OST_OSCMD.cat
0 43668 open:entry df /usr/lib/locale/C/LC_MESSAGES/SUNW_OST_OSCMD.mo

This script, gushellsupport.sh, is owned by InstallShield so I can’t publish the contents of it. But it has a diskcheck function in it that relies on ‘/usr/xpg4/bin/df’ which I didn’t have installed. Solaris has many different versions of the same tools that are left behind for backwards compatibility. When installing this system initially, I used the “Core System Support” option in the Solaris install to build a lean, quick machine. Unfortunately it didn’t come with this legacy version of df.

df belongs in a package called SUNWxcu4. To install it, mount your Solaris CD and go to the directory Solaris_10/Product/ . In there, copy the subdirectory ‘SUNWxcu4’ to /var/spool/pkg and run

pkgadd SUNWxcu4

If you rerun the install again it’ll work since gushellsupport.sh is calling the correct version of df. Talk about obscure huh?

Posted in random, tip | Tagged , , | Leave a comment

Find ConfigEngine tasks in WebSphere Portal 6.1

Sometimes when a ConfigEngine task fails, it can be handy to be able to look up in the code to see more information about which task failed. And since all the tasks are written in plain old xml files it’s quite easy to just go in there and look at them. In Portal 6.0 (and before) this was really easy to do, since all the configuration scripts were located in the same place (or two places – WebSphere/PortalServer/config/actions and WebSphere/PortalServer/config/includes) . You could simply grep over all the xml files in these two directories for the task name that was failing and it would return the xml file the task was in.

From 6.1 and on this is more difficult because the configuration scripts are located with each component of Portal, in form like this: /config/includes/.xml . Here’s a oneliner than you can use to search for task names in just these directories. Run it from the PortalServer directory.


#!/bin/bash
find . -wholename */config/includes/*.xml -print0 -type f | xargs -0 grep -l "task-name"

Here’s the same thing in a script.
config-engine-search

If you make any changes to the ConfigEngine scripts, make sure you take a backup first!

Posted in tip | 1 Comment